
Connect a Digital Piano to an iPad: Cables, MIDI and Sound
Connect your digital piano to an iPad with the right USB or MIDI cable. Identify the ports, handle power and check that your app receives the notes.
Pract.is Editorial
Research-based practice guidance for musicians from the Pract.is editorial team.
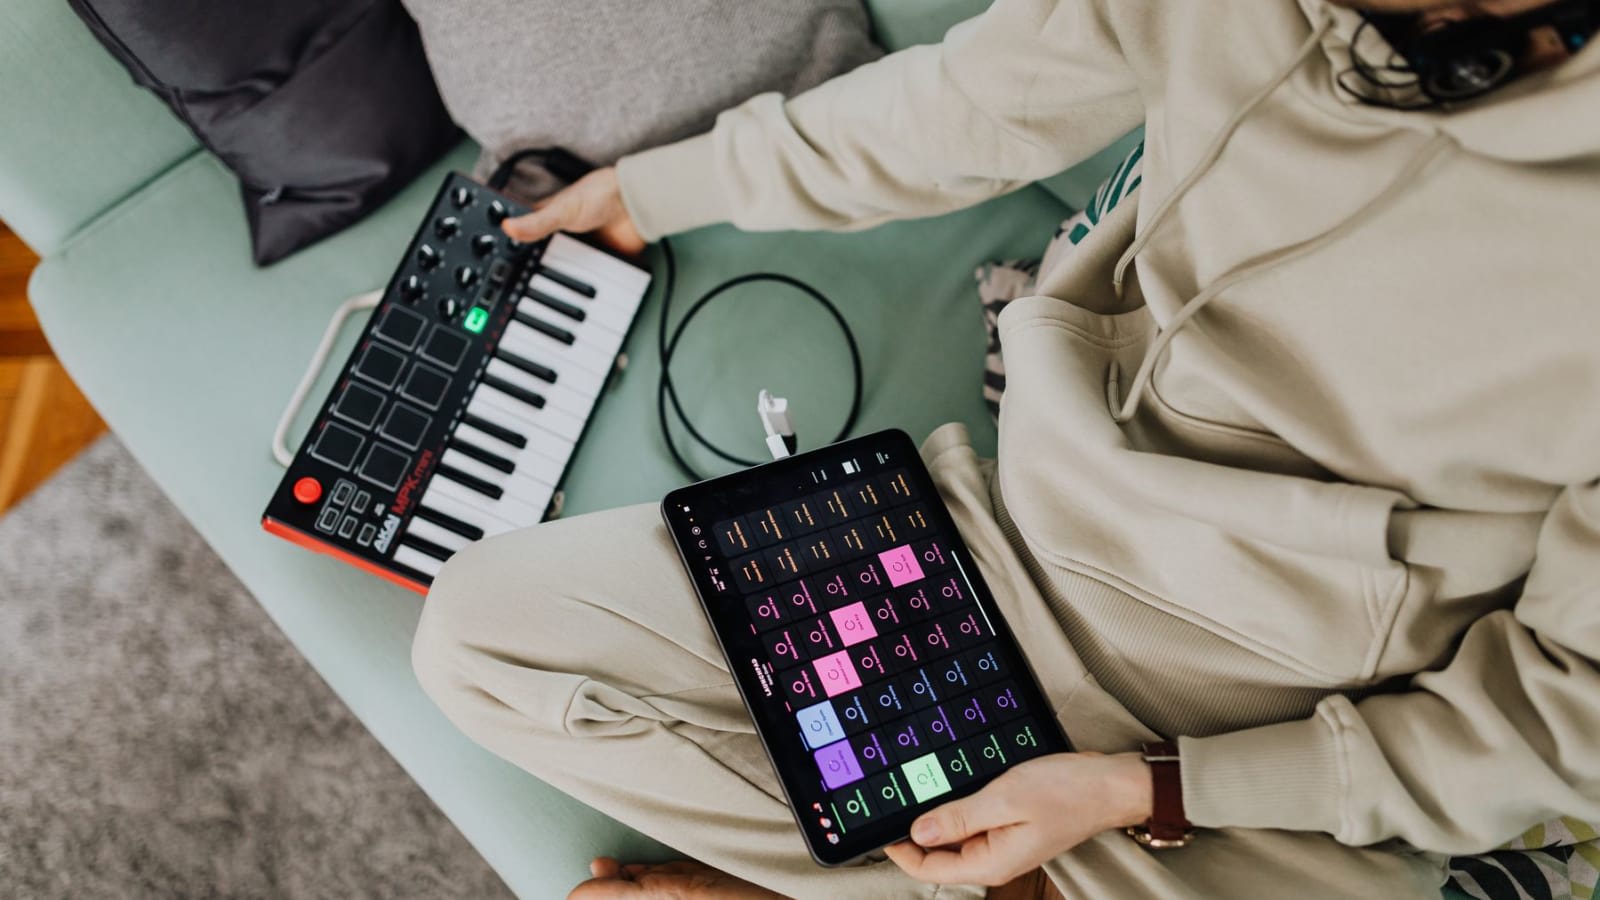
For a digital piano with a USB-B MIDI port and an iPad with USB-C, the usual connection is one USB-C-to-USB-B data cable. A Lightning iPad needs a compatible USB adapter in between. A piano with only round, five-pin MIDI sockets needs a USB MIDI interface. Which route works for you depends on the sockets at both ends and the piano’s iPad compatibility.
Once connected, a compatible learning app can receive your key presses directly. You still need to decide where the sound will come from. We’ll work through those two jobs separately, starting with the instrument already in your room.
Identify the piano’s port before ordering anything
Take a phone photo of the back or underside of the piano so you can read the labels without leaning over it repeatedly. Find the model’s manual and search for “iPad”, “USB MIDI” or “connecting to a smart device”. Confirm that the connection works with iPadOS; a Windows driver download alone does not establish that.

Port 01 · near-square
USB-B
Look for a USB MIDI or USB TO HOST label. The standard USB 2.0 Type-B socket has two bevelled corners. It takes the square end of a cable often sold as a printer cable.

Port 02 · small oval
USB-C
This shape appears on iPads and some keyboards. On the piano, check that it carries USB MIDI. A charging-only connection cannot deliver your notes to an app.
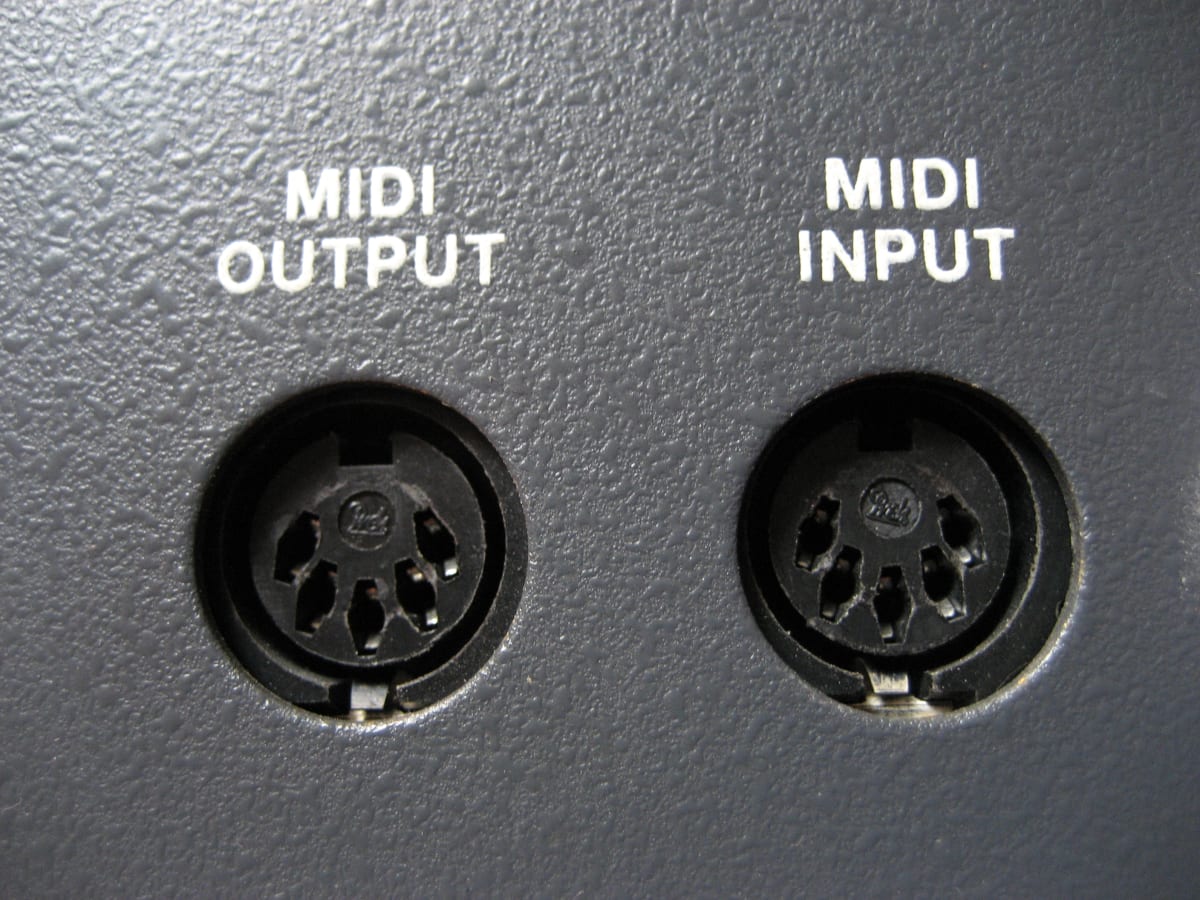
Port 03 · round, five holes
Five-pin MIDI
Find MIDI OUT or MIDI OUTPUT. This is the socket that sends your playing to another device. The iPad needs an interface to receive it.
A rectangular USB TO DEVICE socket is not interchangeable with USB TO HOST. Headphone and sustain-pedal sockets do different jobs again. Yamaha’s connection guide, for example, separates the instrument’s MIDI terminals from its USB TO HOST route. Follow your own model’s instructions if it has a dedicated iPad socket or a smaller Micro-USB connector.
Now check the iPad. A USB-C cable has a hollow, metal-rimmed tip like the photograph above; a Lightning cable has a flat blade with exposed contacts. Use that physical check rather than assuming every iPad Pro or every base-model iPad has the same connector.
Connect a USB MIDI piano to your iPad
For the first connection, use the piano’s normal power supply and follow its manual’s connection order. Close the lesson app while assembling the cables, then power up as instructed and unlock the iPad. Leave a little slack near the tablet so moving a music stand cannot pull on its port.
If your iPad has USB-C
A piano with standard USB-B normally connects through a USB-C-to-USB-B USB 2.0 data cable. The C end goes into the iPad; the B end goes into the piano’s USB MIDI/TO HOST socket. This is the direct route described in flowkey’s iPad connection instructions.
Already own a working USB-A-to-USB-B printer cable? A suitable USB-C-to-USB-A adapter can let you keep it. For a piano whose MIDI connection is USB-C, use a USB-C-to-USB-C cable that supports data. You do not need a premium high-speed cable for ordinary MIDI, but a lead that only supplies power will not work.
Direct connection occupies the iPad’s charging port. For longer sessions, a compatible powered USB-C hub with charging pass-through and a USB data port may be useful. Check its iPad compatibility and power requirements before adding it. Apple’s external-device guidance covers powered connection arrangements.
If your iPad has Lightning
The Apple Lightning to USB 3 Camera Adapter provides a USB-A socket for the piano cable and a separate Lightning inlet for power. Despite “Camera” in the name, Apple also supports Audio/MIDI devices through its USB-A camera adapters.
Lightning setup · USB-B piano
One path for notes, a separate inlet for power
Charger + Lightning cable
Into the adapter’s Lightning power inlet
For a USB-C MIDI socket on the piano, the equivalent cable is USB-A to USB-C, provided the instrument supports that connection. Your everyday Lightning charging cable is not a substitute for the camera adapter.
If the iPad reports that the accessory uses too much power, connect power to the adapter or use the supported powered-hub arrangement. Apple describes both remedies in its USB-A camera-adapter help. A piano plugged into the wall can still need the correct USB power arrangement; its mains supply does not guarantee that every connected accessory receives power.
For five-pin MIDI, connect OUT to the interface’s IN
An older piano can remain useful with an iPad even when it has no USB socket. The missing part is an iPad-compatible USB MIDI interface, which translates between the five-pin connection and USB. A passive plug adapter cannot perform that conversion.
The direction is easy to reverse accidentally: your piano sends notes from MIDI OUT, so that socket connects to the interface’s MIDI IN. Some cable-style interfaces label a plug by the socket it should go into instead. Read the interface instructions and any arrows before matching labels.
One suitable example is the iConnectivity mioXC, a class-compliant, USB-powered interface with attached five-pin leads. It connects directly to a USB-C iPad. For Lightning, its included USB-A adapter lets it connect through the camera adapter described above. “Class-compliant” here means it uses the standard USB MIDI support without a separate driver installation.
With the mioXC, the lead marked MIDI IN goes to the piano’s OUT. The user guide’s data-flow section confirms the direction. Its other lead is for sending MIDI back to the instrument; it can stay unplugged when all you need is for the lesson app to receive your playing.
If you already own an iPad-compatible audio interface with MIDI IN, that may do this job using a normal five-pin MIDI cable. Check the equipment you have before buying another interface. USB audio inputs alone are insufficient: it needs an actual MIDI input.
Three parts that may fill a gap in your setup
These serve different connection routes. A USB-B piano with a USB-C iPad may need only the first cable; a five-pin piano needs the interface instead. Measure the distance with the iPad in its playing position, including the reach around the instrument.
Affiliate notice: Some links are paid links. As an Amazon Associate, we earn from qualifying purchases.
The buttons open Amazon US searches for the named products. Check the selected model, connectors and cable length, since search results can include alternatives.
USB-B piano + USB-C iPad
Cable Matters USB-C to USB-B, model 201002
A USB 2.0 data cable for the direct route. Match the standard, near-square Type-B end to the piano’s socket. It is sold as a printer cable and also supports USB MIDI devices.
Lightning iPad
Apple Lightning to USB 3 Camera Adapter
The version with a separate Lightning power inlet. Add the appropriate USB-A piano cable and your charger. A USB-C-to-Lightning adapter is a different accessory.
Piano with five-pin MIDI OUT
iConnectivity mioXC
A USB-C MIDI interface with attached DIN leads and an included USB-A adapter. Its overall cable length is 1.5 metres. A Lightning iPad still needs a camera adapter.
None of these purchases adds MIDI to a piano that cannot transmit it. If your instrument has no supported MIDI connection, a learning app’s microphone mode may still be an option. Our MIDI keyboard guide covers hardware choices if you genuinely need a different instrument or controller.
Check that the app receives notes
A lit keyboard or a charging symbol proves that something has power. To establish a working MIDI connection, look for the app’s connection confirmation and then test its response to your playing.
- Connect before starting the lesson. In Simply Piano, make the wired connection before opening a level or song and look for the MIDI notification. Its USB setup instructions describe this confirmation.
- Open an exercise that accepts the real keyboard. Simply Piano’s Touch Intro and Keep in Touch courses use the on-screen keys. Choose another course for your test, as its MIDI troubleshooting notes explain. In another app, check its MIDI-input setting or device list if one is provided.
- Test a few notes without relying on the microphone. Once MIDI is confirmed, lower the piano’s speaker volume to zero and play a few notes the exercise expects. The app should still respond to the key presses through MIDI. Restore your listening volume afterward. If it only responds when the piano is audible, revisit the input connection.
If there is no response, first check the socket label, the cable’s data capability and the power supply. For five-pin MIDI, recheck the direction. Then close and reopen the app with the connection in place. An app needs to support MIDI input itself; attaching a cable does not add that feature to every music app.
Can you use Bluetooth instead?
Yes, when both the instrument and the app support Bluetooth MIDI. Bluetooth audio alone cannot send key presses. A piano that plays an iPad’s backing track through its speakers may still lack wireless MIDI.
Simply Piano now connects directly through Menu → Settings → MIDI Settings → MIDI Bluetooth; select the keyboard there. Its current Bluetooth instructions replace older advice about connecting through a separate bridge app. In flowkey’s iPad app, use the song player’s settings and MIDI/Bluetooth Setup. Make the connection inside the app’s MIDI workflow, rather than assuming ordinary Bluetooth audio pairing has done it.
Choose where you’ll hear the piano and the lesson
MIDI carries playing instructions, including note presses; it does not carry the piano’s recorded sound. Some USB connections carry both MIDI and audio, but that is an additional capability of the instrument. Five-pin MIDI cannot deliver the app’s voice, backing track or audio recording to your piano headphones.
For a simple first session, use the piano’s speakers for your instrument and the iPad’s speakers for the lesson. If you need headphones, there are two useful approaches. You can listen through the iPad using an app-generated piano sound, or keep the instrument’s own sound and bring the iPad audio into the piano.
The second approach needs a compatible USB audio connection or a separate audio route into the piano’s AUX IN/LINE IN. With the analogue route, the iPad’s headphone output feeds that input, and your headphones plug into the piano. An iPad without a headphone socket needs a compatible audio-output accessory that can coexist with the MIDI connection. flowkey’s headphone guide explains these arrangements. Confirm the input exists before ordering an audio cable.
Wired headphones are a straightforward starting point for playing in time. Wireless audio delay is a separate issue from Bluetooth MIDI. Our digital-piano headphone guide covers plug sizes, listening conditions and cable fit.
Once the setup works, photograph the connected ports and save a short note naming the cable, adapter, app input and headphone route. That is useful when the iPad has been borrowed for something else and the leads end up in a drawer.
In Practis, you can keep your repertoire, practice plans and session notes together, including the passage to work on next. Cue’s score following uses microphone audio; this MIDI connection does not feed notes into Cue, and silent headphone playing will not reach the iPad’s built-in microphone.
More on gear.

Homeschool Piano Curriculum: A Four-Week App-Based Plan
Build a homeschool piano curriculum around an app, with a four-week plan for reading, listening and playing, plus an editable weekly planning sheet.
Pract.is Editorial

ABRSM Piano 2027–28: Which Syllabus Should You Choose?
Keep your 2025–26 piano pieces or start the new ABRSM syllabus? Understand the 2027 overlap, video deadline, one-hand options and correct book editions.
Pract.is Editorial

Android Tablets for Sheet Music: Size, Pen and Stand Fit
Compare Android tablets for sheet music by actual page size, pen support and stand fit, with a to-scale visual and full setup budgets for three models.
Pract.is Editorial